
Reply to the sender
Answer each webhook with your own JSON, text or XML body.
A custom reply is the body Hookspot sends back to each webhook’s sender, in
place of {"status":"ok","request_id":"req_…"}. This guide sets one on
Docs demo and checks it with curl.
Set a custom reply
Section titled “Set a custom reply”- Open Routes, click the Docs demo card and click Open.
- Under Reply to sender, click Customize.
- Check Send a custom reply to the sender.
- Keep JSON as the Reply content type.
- Enter
{"accepted":true}as the Reply body. - Click Save.
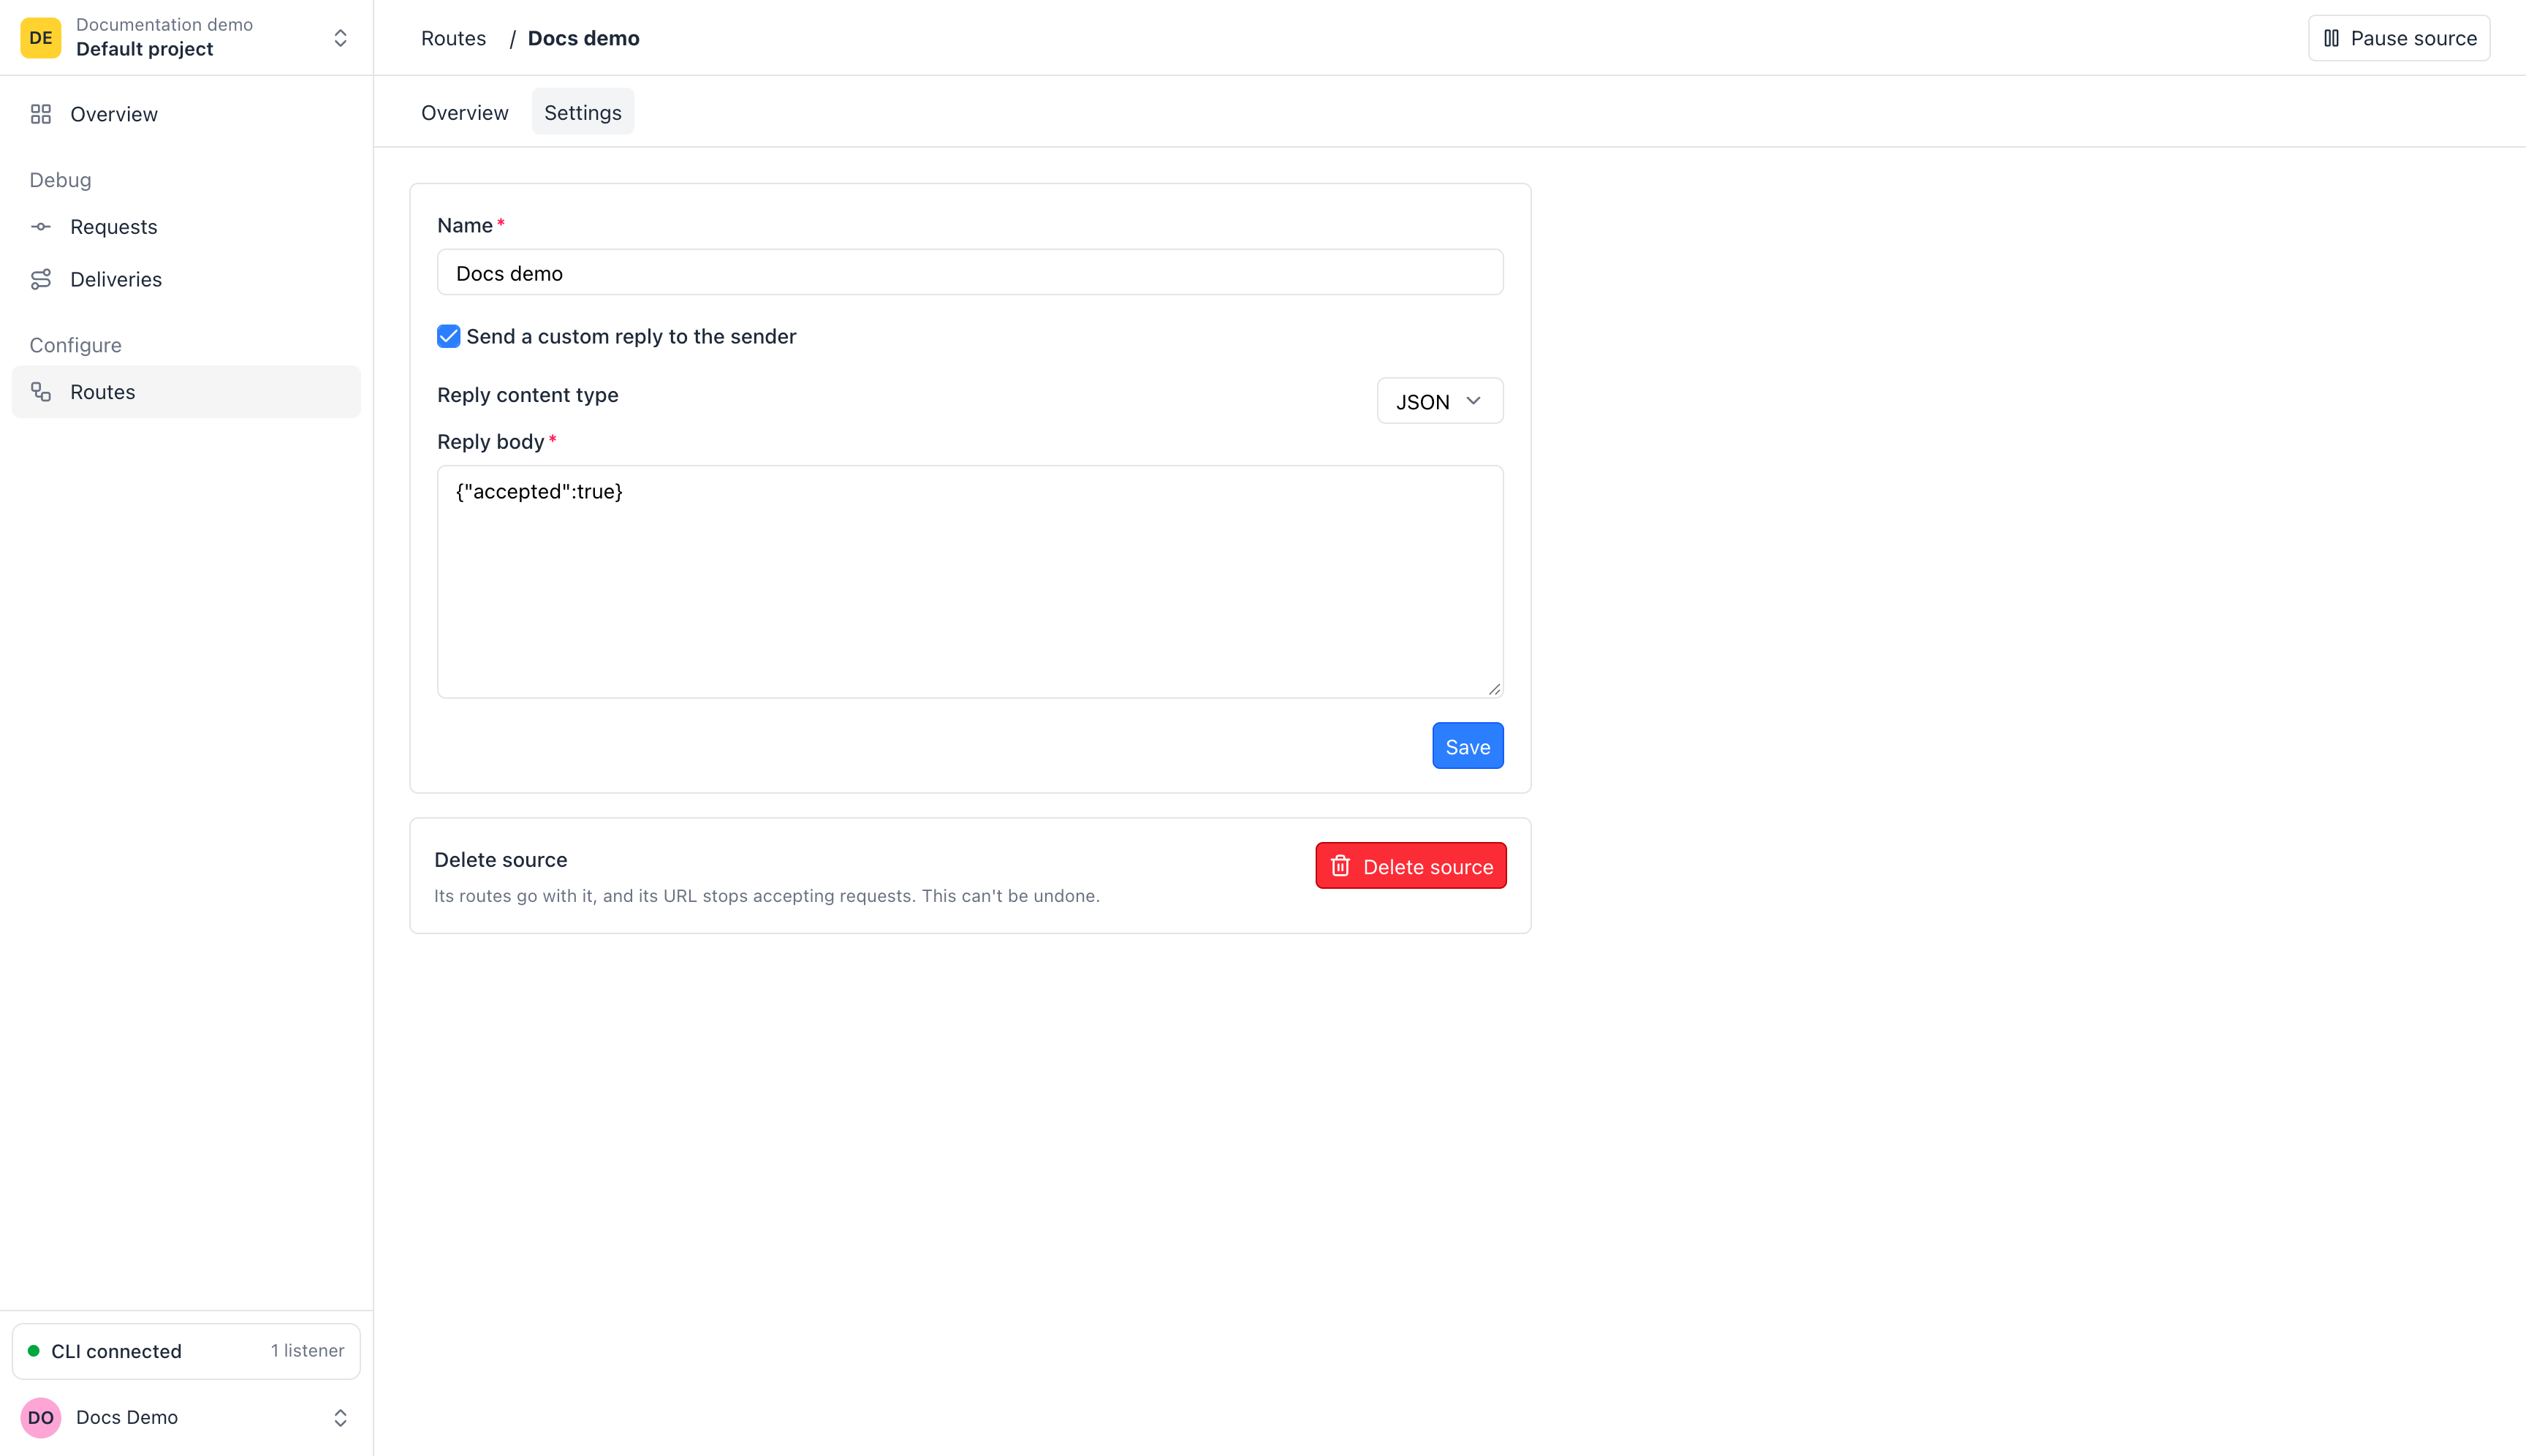
The reply changes only what the sender gets back. Your app still gets the webhook as it arrived.
If the body is not valid JSON or XML, the form shows invalid json or
invalid xml and keeps the old settings.
Check the reply
Section titled “Check the reply”The source’s Overview shows a curl command that sends a test request to
its webhook URL. Copy it with the button beside it, and run it:
curl <webhook-url> -H 'content-type: application/json' --data-raw '{"type":"hookspot.test"}'{"accepted":true}Hookspot still stores the request and forwards it to your app. Under Reply to sender, the source’s Overview shows the reply it sends now.
Choose the content type
Section titled “Choose the content type”Pick the Reply content type that matches your Reply body: JSON, TEXT or XML. The sender gets the body with that content type.
The status is always 200, and you cannot add headers. A rejected request gets
the reply too.
Go back to the default reply
Section titled “Go back to the default reply”- Open the source’s Settings.
- Uncheck Send a custom reply to the sender.
- Click Save.
Hookspot deletes your reply body and answers with
{"status":"ok","request_id":"req_…"} again.