
Quickstart
Send a test webhook through Hookspot to the app on your machine.
This quickstart sends a test webhook through Hookspot to the app on your machine. You sign up, create a route and run the CLI, then send the webhook and inspect it.
Prerequisites
Section titled “Prerequisites”- Node.js 18 or newer, or Homebrew, to install the CLI.
- An app on your machine that answers
POST /webhookson port3000with a2xxstatus, if you have one.
Create an account
Section titled “Create an account”Open the Sign up page in Hookspot.
- Click Sign up with GitHub or Sign up with Google. Or enter a Name, Email and Password, and click Sign up.
- If you signed up with email, click Confirm email in the email Hookspot sends you, then sign in.
- Enter a name under Create organization and click Start.
Hookspot creates a Default project and opens its Overview with four setup steps.
Create a route
Section titled “Create a route”Create a route from a new source to a path in your app.
- In the setup steps, click Create source.
- In the New route dialog, enter Docs demo as the Name.
- Enter
/webhooksas the Path in your local app. - Click Create route.
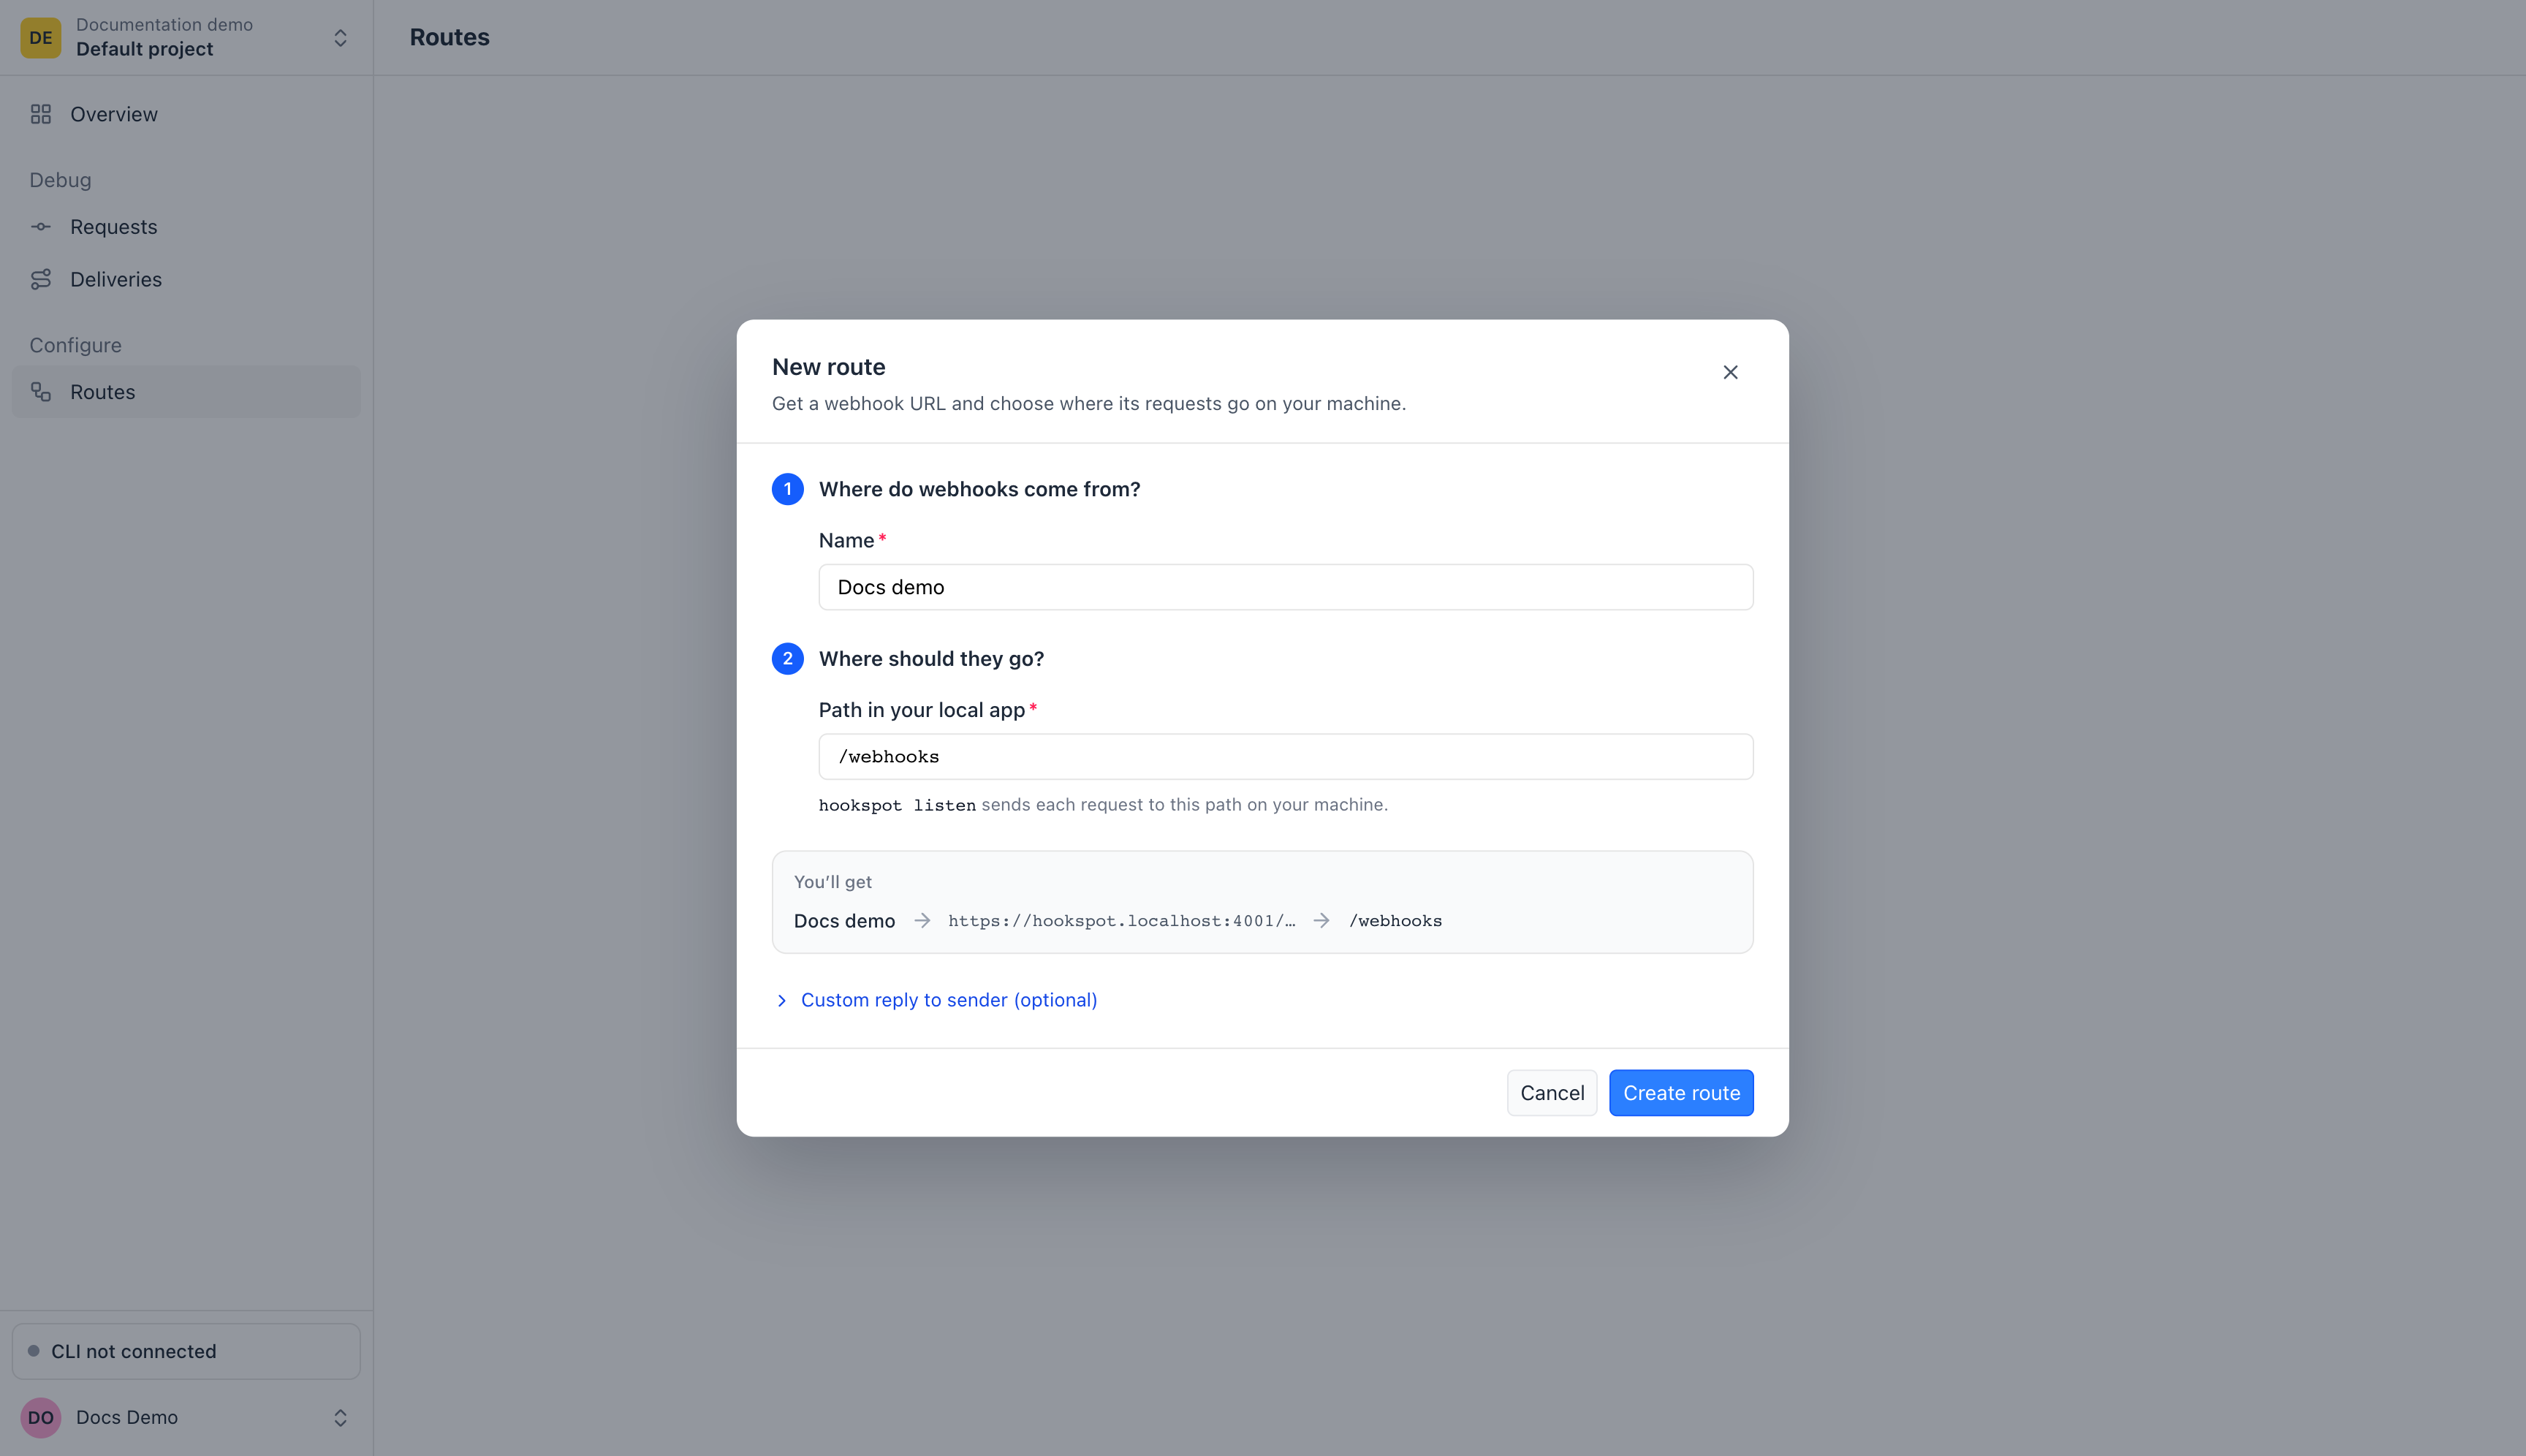
Under You'll get, the dialog previews the route: Docs demo, its webhook URL, then /webhooks.
The Routes board opens. Click the Docs demo card to see its Webhook URL, which you paste into the service that sends webhooks.
Run the CLI
Section titled “Run the CLI”Install the CLI with npm:
npm install -g @hookspot/cliWith Homebrew, run brew install hookspot/hookspot/hookspot-cli instead.
Log in. The CLI opens your browser and prints a code:
hookspot login╭─ Log in ──────────────────────────╮│ Confirm this code in your browser ││ ││ 2NCL-AXSJ │╰───────────────────────────────────╯https://<hookspot-host>/cli/login/<token>○ Waiting for approval… (Ctrl+C to cancel)✓ Logged in as you@example.com✓ Active project set to Documentation demo | Default projectIn the browser, check that the Confirmation code matches and click Approve login. The organization and project you pick there become the CLI’s active project.
Forward webhooks to your app on port 3000:
hookspot listen --forward-to http://localhost:3000The CLI opens a full-screen view and waits. Your app gets each webhook at
http://localhost:3000/webhooks, as
Forward to your app explains.
If you have no app yet, leave out --forward-to.
Send a test request
Section titled “Send a test request”Open Overview in the app and click Send test request. You can also
press t in the CLI.
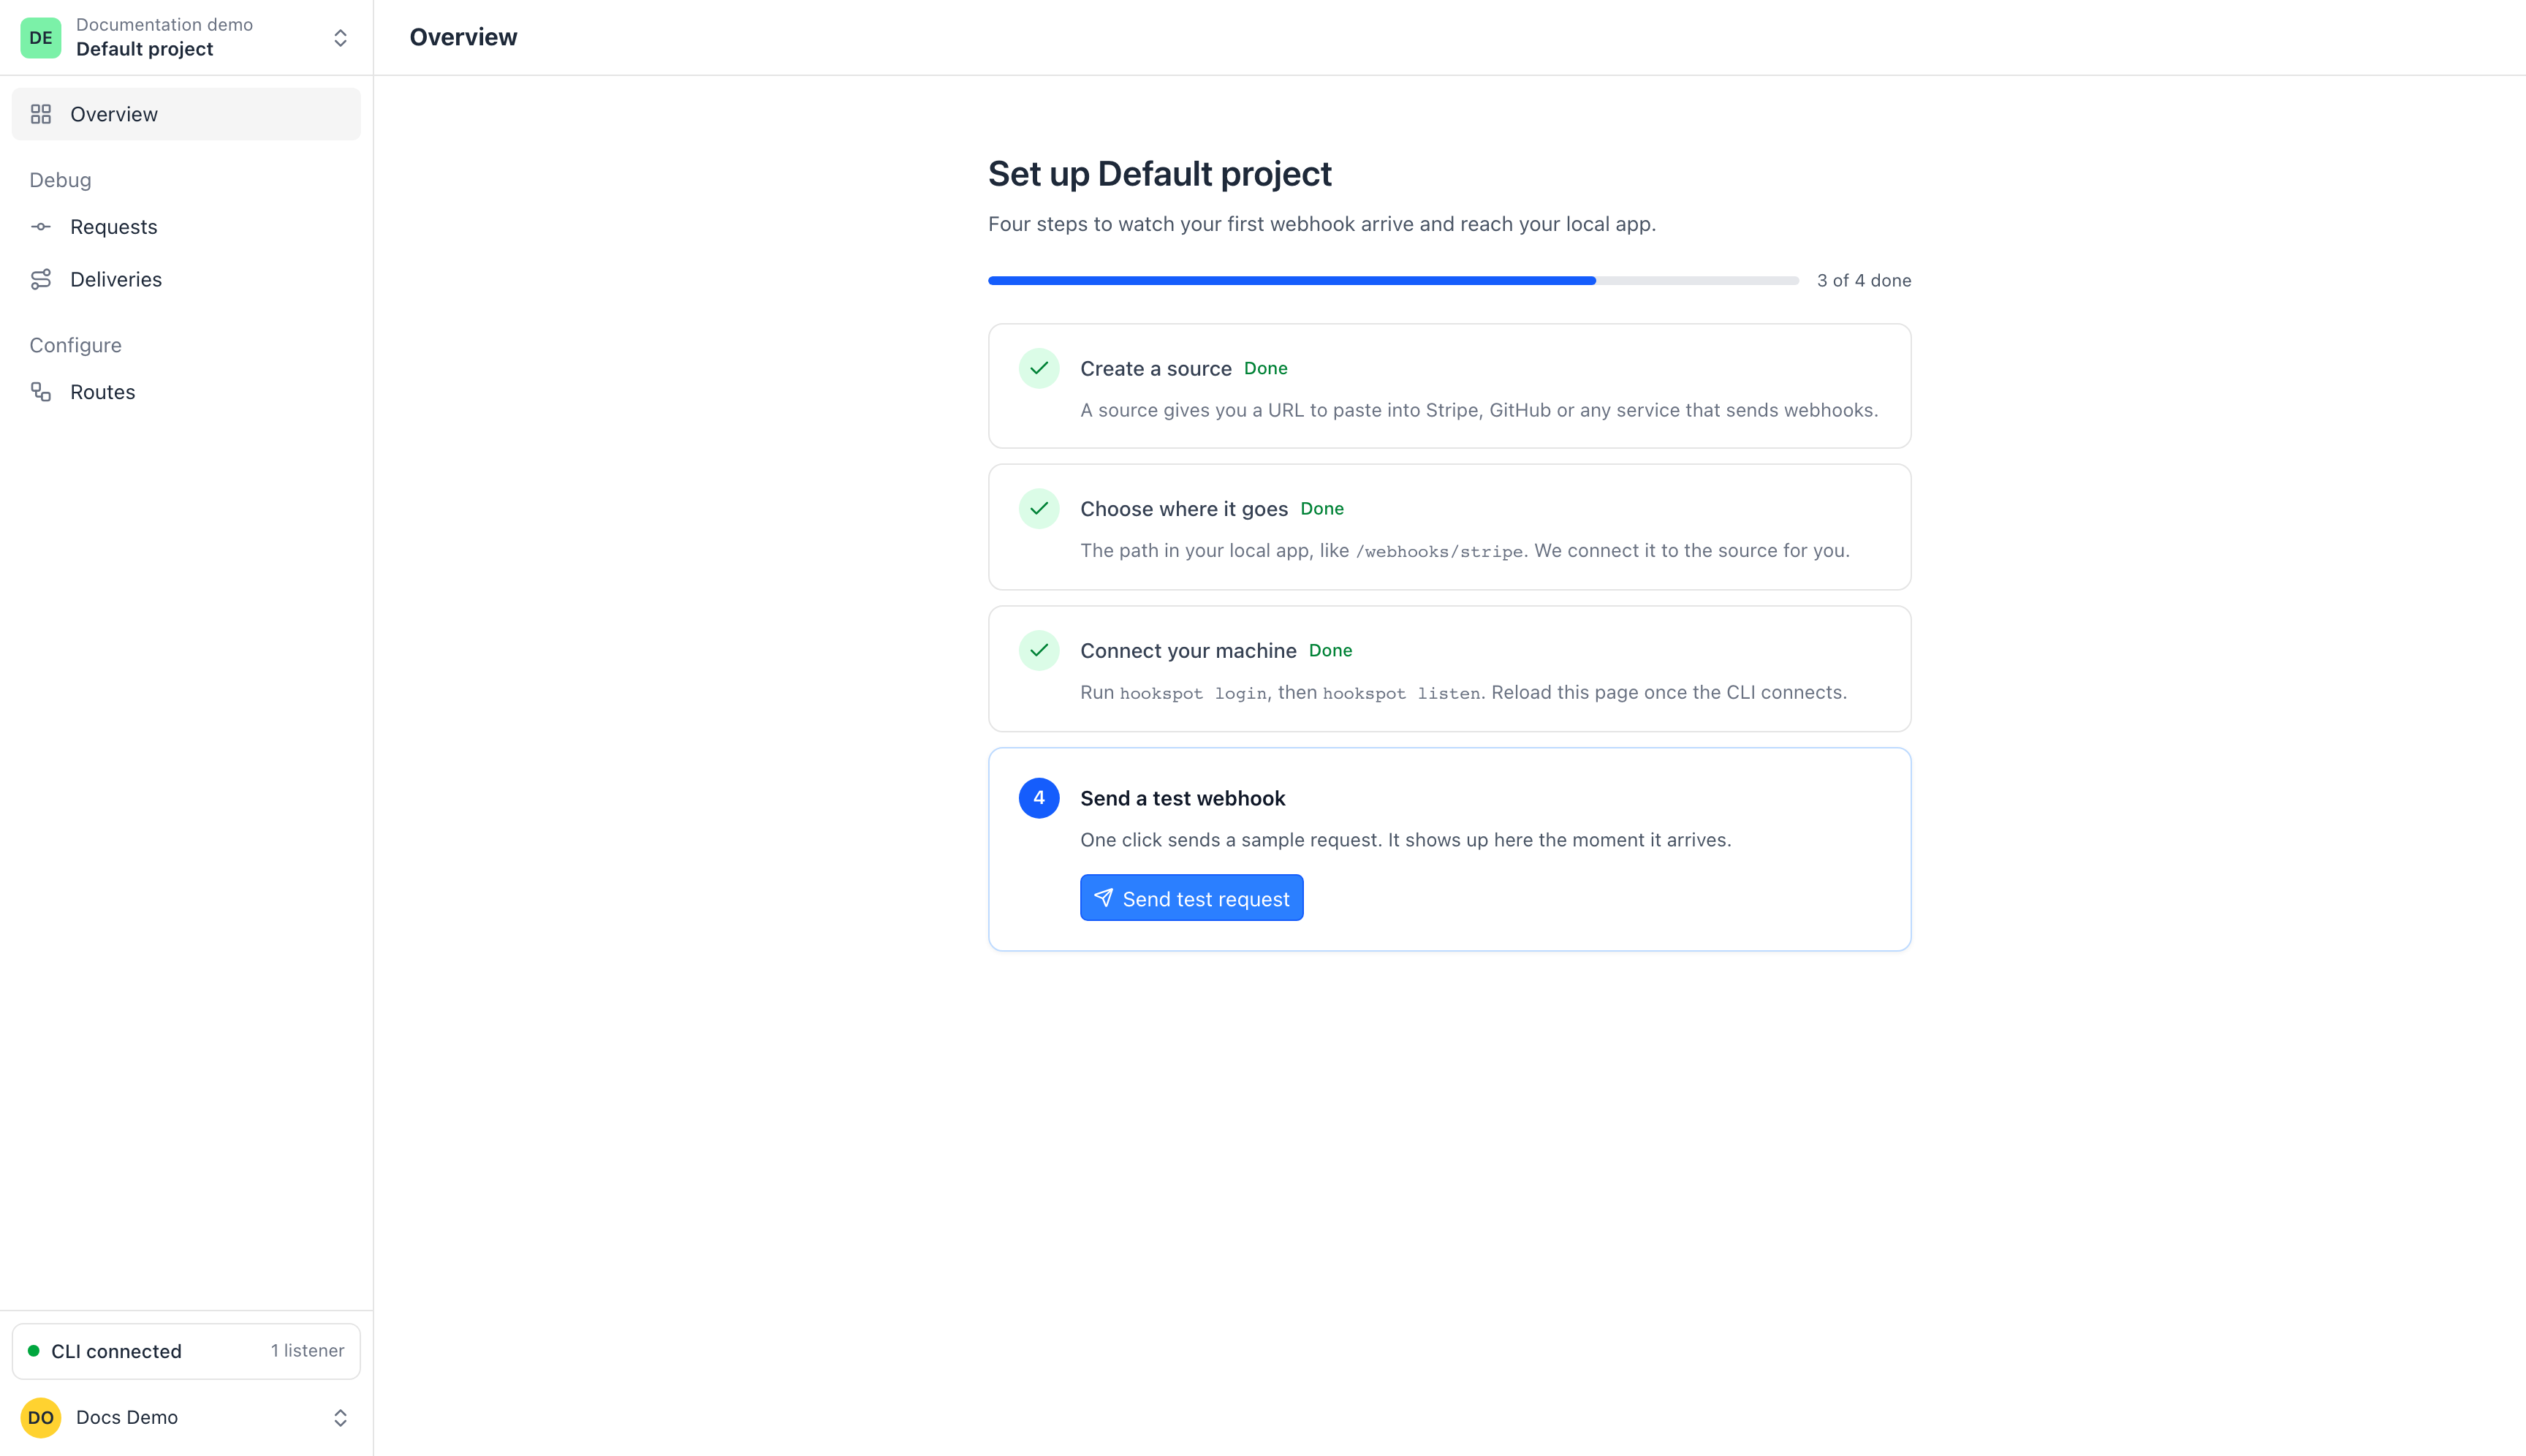
Connect your machine shows Done once hookspot listen connects and you reload the page.
Inspect the request
Section titled “Inspect the request”The CLI lists the request and shows what your app answered.
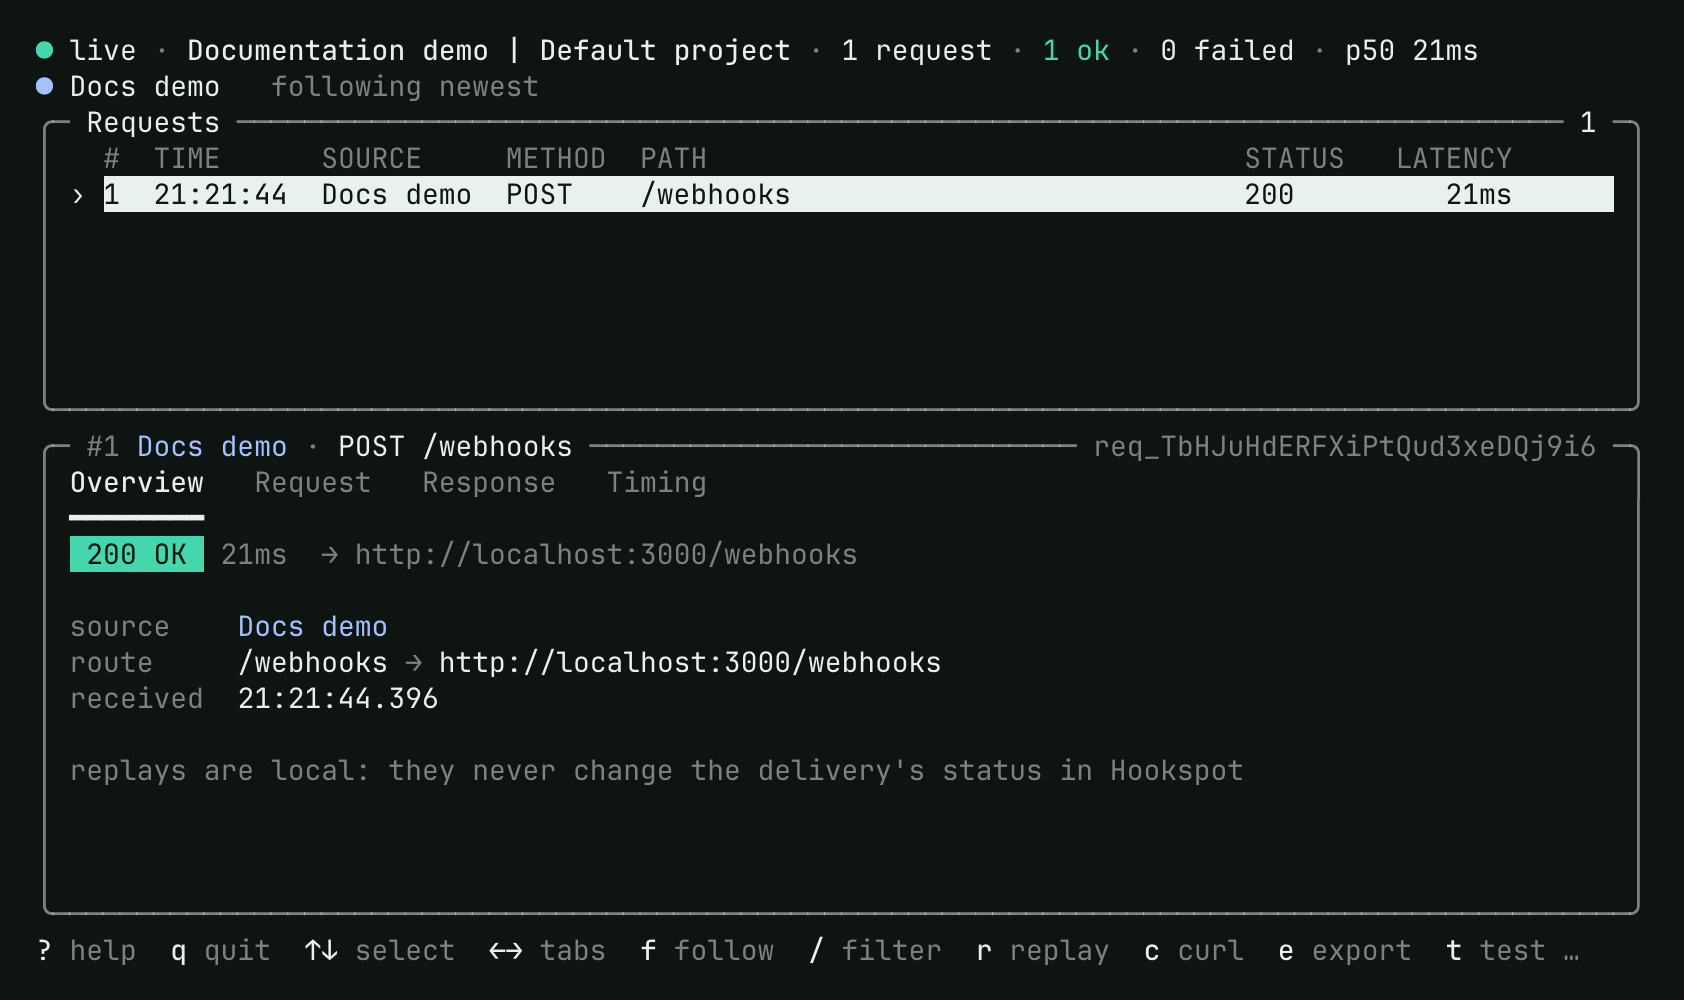
The list at the top holds each request. The panel below shows the selected one.
In the app:
- Open Requests and select the new row. Its Outcome is Delivered
with
200. - Read What happened: Received, Routed to 1 route, then Delivered · 200.
- Select the Response tab to see the status, headers and body your app answered.
Next steps
Section titled “Next steps”Press q to stop the CLI. Keep the Docs demo route, because the guides
build on it, starting with
Inspect and retry a webhook.